Sunday, December 29, 2013

Oregon Clam Chowder

I know a lot of people have clam chowder for Christmas Eve. We have tacos. I don't know why - that is just what Grandma and Grandpa Jack did. It is tradition and we love it. So that is what we had. However, Tyler brought home a whole bunch of cockles from a dive at the North Jetty in Florence. His very kind Grandpa Ron ground them up before he brought them home so I didn't even have to tenderize them and chop 'em up. Blessings to them both.

I should also say, I don't like clam chowder. I mean, I won't eat it in a restaurant. I think Mo's is awful. I never thought I'd eat any. Ever. Amen. And then I made a batch myself. Mind changed. It happens, people.

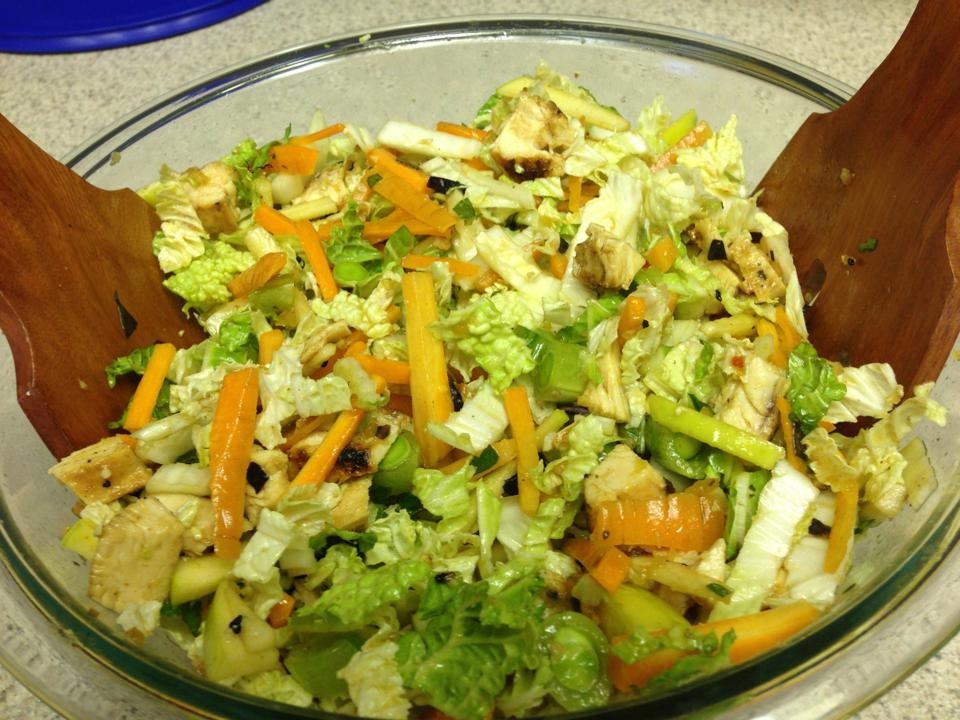
Veggie ingredients, except the half onion and carrots

If your son didn't bring you fresh, prepped cockles you can use any clam you like - fresh preferred, but canned works. Rather than using a clam chowder recipe as the frame for this recipe, I started with a potato leek soup recipe. It tastes rich and creamy, but doesn't use any added thickener or cream. So it doesn't taste like flour and half and half.

Ingredients:

  • 2-3 tablespoons butter and/or canola oil
  • 1 leek - white and light green parts only - sliced and washed well
  • 1/2 an onion, chopped
  • 4 potatoes, give or take, sliced and then cut in half
  • 1 parsnip (optional, I guess), sliced
  • 2 carrots, sliced
  • 2 cups veggie or chicken broth (mine was low sodium chicken broth because it was open)
  • 2-3 cups water (or enough to cover the veggies)
  • 1 cup milk (I used skim)
  • 2(ish) cups finely diced or ground cockles or some kind of clams
  • salt, pepper, paprika to taste
  • 2 bay leaves
  • 2 sprigs thyme or whatever fresh or dried herb you fancy
Leeks grow up through the dirt. Dirt gets between each layer. So you'll want to swish them in water to get it all out. I always recommend organic. I can't afford to get everything that way, either. But anything that requires special washing I try to get organic for sure. This one - and the parsnip and onion - were from my CSA. (Potatoes were from Rob's mom's family farm in rural SE Oregon. Such a treat!)

Washing sliced leek in my awesome new strainer.
Heat a dutch oven or other heavy stockpot on medium; add butter and/or canola oil. I used a tablespoon of butter and about 1.5 tablespoons of canola oil. Add onion and leeks. Cook until soft and a little bit golden, about 10 minutes. (Reduce heat when needed. I reduced mine to medium-low after 5 min.)

Meanwhile, the potatoes, parsnip, and carrots can be diced or sliced. I sliced with a mandolin and then cut the large ones in half. It just makes them cook faster and mash up a bit easier later. Dicing is fine if you don't have a mandolin or don't want to wash it later. (Been there, done that.) Add to the pot and stir to combine. 

Add broth and water to cover veggies. Add more of either one if it doesn't quite cover. Add some salt and the bay leaves now. I put in about a teaspoon. Bring to boil over medium heat and simmer, covered, for about 10 minutes or so until the veggies are soft. With a potato masher (or fork or whisk - I used a plastic whisk) mash up the veggies until in bits. You could use an immersion blender or blend in batches, but I didn't want mine completely smooth. It is entirely up to you. 

it will look kinda like this when you have all the veggies and liquid in.

Add whatever clams you are using (no need to drain juice - add it too) and the milk. Add the fresh thyme if using. Put in pepper and paprika to taste. Let simmer without coming to a boil for 5-10 minutes. Taste. If it needs more salt, pepper, or paprika, add it now. If it is too thick, you can add more of any of the liquids you prefer. Simmer until you are ready to eat. 

The soup pot will look something like this at the end.
Caution: the smell of the finished chowder will attract teenage boys. Or at least it did at my house during Winter Break. I didn't do it tonight, but I would highly recommend bread bowls for this chowder. You didn't use any flour or cream and very little butter, after all. 

My half eaten bowl. Yeah, I was hungry and forgot to take a picture right away.
So if your winter moments bring you root veggies and cockles, or if you just have a hankering, make yourself and loved ones a steaming pot of this chowder. It will certainly warm your winter moments. 


Saturday, December 7, 2013

Broiled Persimmons with Greek Yogurt

Fall and winter desserts are so deliciously rich and substantial. Afterwards we end up feeling too "substantial" to get off the couch. Hibernation food. Now that is fine and dandy after Thanksgiving dinner, but what's a girl to do when a sweet end to the meal is in order, but you don't want to end up in a food coma?

Enter a lovely little fruit that shows up in late fall: the persimmon.

Fuyu Persimmons. Photo by Rob Loper
I made a delicious butternut squash risotto for a cozy dinner at home. The evening called for dessert, but after the risotto I thought something light would be best. I stared at the persimmons from my CSA. I'd never eaten one and let them go a little longer than I should have with this variety because I didn't know what to do with them.

So, I just plunged in. I pulled the stems out, sliced them horizontally and placed them on a small baking sheet. Then spread about 1/2 - 3/4 teaspoon of honey on top of each half. I turn on the broiler and placed the baking sheet on top rack of oven. I broiled them for about 5 minutes, but you should check each minute after 2 minutes. If some of the honey drips off onto the pan it will smoke a bit and smell like it is burning even though the fruit is fine. (But you might want to turn on the fan, because smoke alarms don't know nothing is really burning.)

When lightly browned around the edges, remove from oven. Top with a dollop of Greek yogurt (I used plain, non-fat, but honey or vanilla would also be good), sprinkle with cinnamon-sugar blend or drizzle with additional honey, and top with fresh or dried mint, finely minced or crushed. If you want your desert to be a little less virtuous, you could top with whipped cream or sweetened, whipped cream cheese or mascarpone. Or perhaps a little vanilla bean ice-cream.

The finished product. Photo by Rob Loper
Now, I think these would have been better if I hadn't refrigerated the persimmons for a few days ahead of time as I think that diminished their flavor a bit. However, broiling seemed to bring it back out. That actually works with a lot of fruits. Like roasting does for veggies. It also helps if you eat by candlelight. Really, everything is so elegant and appetizing that way. You should all try it.

Beautiful end to a meal. Photo by Rob Loper
I've had lots of food on my table in the past couple of months, but keep forgetting to write down the recipes or take photos. So I haven't blogged anything in awhile. It seemed mean to say, "Hey, I ate this really terrific thing, but I can't tell you how to make it or show you any photos." Reminds me of a big fish story.

I hope you are all savoring your sweet moments at the table as much as I am mine.

Saturday, September 28, 2013

Fresh End of Summer Salads

Fall is in the air, and I'm sure I am getting the last of the summer fruits and vegetables. I'm not ready. If I stomp my feet and shake my fist at the sky, will the warm sun and long days come back? Don't get me wrong, I do love autumn with it's changing leaves, football, crisp morning air, and cinnamon added to so many dishes. But I'm just not ready yet. So here are two summer salads that I think look like sunshine on a plate.

First, Golden Beet & Tomato Salad. I know some of you think you don't like beets and maybe you really don't. But please don't judge them by the canned pickled things you've eaten at grandma's house.

Sunshine on a platter.

Ingredients:

  • Golden beets (I had like 8 small ones)
  • Tomatoes - preferably Roma (I used 5-6)
  • 3-5 Roasted Garlic cloves, depending upon how much you like garlic
  • Chèvre, about 1/4 - 1/3 cup
  • Vinaigrette (I used a honey mustard one with tarragon in it, but any kind will do)
  • Salt and pepper to taste

Directions:
Preheat oven to 400. Scrub beets and trim off greens. (Save greens for another use - they are tasty.) Place beets on foil on a baking dish, drizzle with olive oil and sprinkle with salt. Wrap foil around beets. Bake for 30 - 60 minutes until a fork or knife can easily be inserted (like a baked potato.) I know this is a big range of baking time, but it really will depend upon the size of your beets. Unwrap and let cool. Peel with a knife; the skin will come right off now. Slice beets.

Slice tomatoes, and place slices on plate lined with paper towel. Sprinkle with salt. Allow to sit for 15 minutes, flip, and let sit another 15 minutes. You can skip this or shorten time, but it helps keep the salad from getting watery. 

On a platter, layer beets and tomatoes with a partial overlap in a ring shape. I put a couple beet slices together because my beets were quite small. Put any extra slices in the middle. Cut up roasted garlic and sprinkle on top. Crumble chèvre (you could also use feta) and sprinkle on top. Salt and pepper to taste. Drizzle with vinaigrette. Serve cold or at room temperature. 

The second salad really is just a way to dress up mellon. It doesn't even have a title. It is based on a lovely side dish my friend Karen made for me that had honeydew and cucumber chunks with a similar topping, only mixed altogether. So refreshing. I don't know what the mellon I used is called. My CSA list just said "mellon." The flesh looks like cantaloupe, but the exterior was different and it was sweeter. However, this would work with any mellon.

Here is the mellon cut in half

Ingredients to serve one person:
  • 1 cup diced mellon
  • 1-2 tbsp plain, non-fat greek yogurt (or whatever yogurt you want)
  • Drizzle of honey (maybe a teaspoon or so?)
  • Sprinkling of crushed or minced mint (Crushed if dried and minced if fresh)

Directions:
Placed mellon in a bowl. Dollop the yogurt on top. Drizzle with honey. Sprinkle with mint. Eat.


Sum, sum, summertime!

I'm holding on to the last moments of summer with these sunny salads. I hope what is on your table in this moment will help you keep that warm summer glow going, too.

Wednesday, September 4, 2013

Tomato Soup for Grown Ups: Roasted & Spicy

I had 11 tomatoes. 11. Yes, 11. When one is the only person in the house eating tomatoes, that is a lot. I made salsa with the last batch and caprese salad with the one before that. And we were expecting a gray day. Therefore, my excuse for end of August soup.

I love grilled cheese and tomato soup. Even Campbell's soup with grilled cheese made with plastic cheese on Wonder Bread. But this... this is something... special... and zippy.

Ingredients:

  • 10 (or so) tomatoes, quartered
  • 1 small onion cut into about 1/2 in. pieces (or half of a large one, duh)
  • 1 or 2 jalapeño peppers, seeds and ribs removed, and quartered
  • 5-7 stems cutting celery (aka smallage) - optional. You could also use celery stalk with leaves.
  • Oil, preferably extra virgin olive oil
  • Pinch red pepper flakes
  • Salt & pepper to taste
  • 28 oz canned tomatoes with juice (or more fresh tomatoes if your cup runneth over)
  • 1 - 1.5  cup red wine
  • 1/2 tsp. smoked paprika
  • 1/4 tsp. cayenne pepper - optional
Directions:
Pre-heat oven to 425. Add tomatoes, onion, jalapeño peppers, and celery to a rimmed baking sheet, roasting pan, or stoneware pan. Drizzle generously with olive oil. Add red pepper flakes and salt and pepper. Shake or toss to coat. Roast in oven for about 45 minutes, shaking pan twice. You could also add garlic cloves when roasting, if you like. I didn't this time, but probably would have if I had some on hand.

It should look like this and make your mouth water when done roasting.

Let cool for a bit so it doesn't explode when you blend it. It doesn't need to be cold or even clear down to room temperature, but you should be able to handle it. Put all, including juices, into blender or food processor and blend until pretty smooth. You may need to do this in batches depending on the size of your blender or food processor. It won't look like Campbell's, mind you, but pretty smooth. Pour into large saucepan or stock pot. Add canned tomatoes to blender or food processor and do the same with those. Add to stock pot. Add wine, smoked paprika, and cayenne. Stir to bring together. Bring to a low boil, then reduce heat to low and let flavors come together for at least 10 minutes - and up to 30. You could add milk or cream too if you wanted to make it creamier. It was rich and creamy enough as is for me.

Here is what it looks like just after you add everything.

If you like, top your soup with greek yogurt/sour cream and/or pesto. I used both and it was yummy.


I had mine with a baguette spread with chèvre, then topped with a sprinkle of shredded cheddar and parmesan cheeses and broiled until melted and a green salad topped with a delicious sweet onion/tomato dressing from a local farm called Thistledown. Use your imagination. Your childhood favorites can be even better with fresh veggies and some spice. 


Full meal deal.

This is what is on my table at the moment. And I'm pretty sure it will be on my table in several Fall moments. I hope what is on your table is just as comforting and nourishing. 


Sunday, September 1, 2013

Miraculous Risotto

If you think risotto is too time consuming, fear not, gentle reader. I won't disappoint you with something complicated and time consuming. I bring you the miraculous one pot wonder (and a great way to use some leftovers) that is my version of risotto. Honestly, I've put all manner of leftover veggies and proteins in this recipe. Below is really just a guideline.

Latest risotto and hungry hungry hippo as dinner companion. 

Basic ingredients:

  • 5 cups of broth (vegetable or chicken are usually my choices)
  • 2 cups water
  • 2 Tbsp. unsalted butter
  • 2 cups Arborio rice
  • 1 cup dry white wine (I did a sweeter wine once with apple chicken sausage and dates)
  • 1 cup Parmesan cheese
  • 1 tsp. lemon juice (sometimes I forget this part, but it is especially nice with spring veggies and shrimp)
  • salt and pepper to taste

Add ins:
  • Proteins: any kind of bean, chicken, shrimp, scrambled egg, sausage... probably other choices. 
  • Veggies. My favorites are: caramelized onions, asparagus, peas, celery, summer squash - but really anything will work. 
  • Flavor enhancers: fresh and/or dried herbs that go with your choices of proteins and veggies, dried currants/raisins/chopped dates if you want some sweetness, chopped nuts, garlic (roasted or regular).
Basic directions:
In a large saucepan over medium heat, combine broth and water and bring to a simmer. Reduce heat.

Add butter to dutch oven (or heavy, large sauce pan) on medium heat. Once melted, add rice to the pan, stirring to coat. Cook, stirring frequently, until the grains just begin to be translucent at the edges - about 3 minutes.

Add the wine and cook, stirring constantly, until fully absorbed about 2-3 minutes. Stir 5 cups of hot broth mixture into the rice. YOUR CONSTANT STIRRING IS NOW COMPLETE. DO A HAPPY DANCE. Reduce the heat to medium-low, cover and simmer until almost all liquid has been absorbed and the rice is just al dente, 15-20 minutes, stirring twice during cooking. (Okay, sometimes I only stir once - and last time I forgot to stir at all.)

Remove lid and add 3/4 cup hot broth mixture and stir gently and constantly until risotto becomes creamy, about 3 minutes. Salt and pepper to taste. Stir in Parmesan. Add lemon juice. Remove pot from heat, cover and let stand 5 minutes. 

Add in directions:
Most of the add ins should be added toward the end. Asparagus can be added to the hot broth mixture to cook for about 5 minutes or so to soften. Peas can be added just before the Parmesan. (Last time, I used mixed frozen veggies - gasp! - and added at that time.) Leftover chicken can be added at that point too. Heat up or keep over heat on stove until heated through. If using shrimp, add to top of risotto before adding last 3/4 cup of broth mixture, replace cover and steam until pink and cooked through. If you add onion or garlic, add extra butter or olive oil before adding rice and cook, then add rice and continue as rest of recipe. Veggies like carrots need to be steamed or added at beginning to cook through. I used smallage in this last batch. (Not to be confused with shrinkage. Kind of a wild celery that looks like parsley. Also called cutting celery. ) I cooked with garlic in butter before adding rice. If you have leftover veggies, just add them at the end and heat through before adding cheese. Fresh herbs and dried fruit should be added with the 3/4 cup of broth at the end. Dried herbs can be added earlier - when you add the 5 cups. Nuts I'd add at the end. Beans add when you put in the 5 cups of broth mixture. Or if you forget, heat up and add at the end. No big deal.

Get the idea? Just add leftover stuff at the end and heat before adding the cheese. If you don't have Parmesan, use whatever cheese you have. You can even poach chicken in the broth mixture, then remove and shred. Seriously, clean out your fridge and everyone will think you slaved for hours. 

Sometimes in the moment I need to clean out my fridge because a fresh batch of veggies is on its way. An absolutely incredible woman I know called this fridge frolic. Repurpose your leftovers and frolic in the this moment.


Friday, August 23, 2013

A Tale of Two Eggplants - or rather one eggplant two ways

I was so happy when I saw this beautiful eggplant in my share last week. I love eggplant, but have never actually cooked it myself. A new adventure. I just love a new adventure.


Pretty purple eggplant

I searched for recipes, as usual wanting to find ones where I had all the ingredients already in my house. Let's say it is because I want to use all the in-season ingredients in my CSA and not because I'm too lazy to go into a grocery store unless I'm out of coffee.

So many wonderful options. Seriously, this is an all-around good vegetable. But I only had one eggplant. I finally decided to divide it in two and make two recipes. The first is mostly based on this one from Real Simple, though I cut it in half (http://www.realsimple.com/food-recipes/browse-all-recipes/curried-eggplant-tomatoes-basil-00000000011403/index.html). Why? Because my friend Rob said he likes curry. I do too. And it is awesome in this recipe.

Ingredients:

  • 1/2 onion, chopped
  • 5 tomatoes, cut into 1/2 in. pieces (approx. depends on size and how much tomato you like)
  • 1/2 eggplant cut into 1/2 in. pieces
  • Olive oil as described below (or other veggie oil. Does not need to be olive for this recipe)
  • 1 tsp. curry powder (maybe a bit more if you like curry like I like curry)
  • Pinch of red pepper flakes
  • 1 cup water or vegetable broth
  • 1/2 can of cannellini beans 
  • 1/4 cup basil
  • Salt and pepper to taste
  • Greek yogurt or sour cream to top (optional)
  • Rice or whatever you want to serve the eggplant curry over. I used Forbidden Rice (AKA Black Rice, but that doesn't sound as cool)
Directions:

Coat the bottom of a pan with oil. Add onions and cook for about 5 minutes, stirring occasionally. Add tomatoes, eggplant, curry powder, red pepper flakes, and some salt and pepper. Cook and stir for about 2 minutes. Add water and bring to a boil before reducing heat to a simmer and partially covering. Cook for about 15 minutes, or until eggplant is tender.


Uncover and stir in beans. Cook for about 3 minutes to heat through. Remove from heat. Stir in basil.

Smells devine!

Serve over whatever rice, pasta, potato, quinoa, grain, etc. that you want. Top with Greek yogurt or sour cream if desired.

Yummy finished eggplant curry.

With the other half of the eggplant I made a Martha Stewart recipe for eggplant-tomato relish. Don't diss Martha. She is like Chuck Norris, only you'd eat well with her and say it is a good thing.

Ingredients:

  • 1 14 oz. can whole peeled tomatoes, torn into small pieces (I would have used fresh, but Martha said a can... and I'd used the fresh ones I had in the curry. Include juices.)
  • 1/2 eggplant
  • 2 unpeeled garlic cloves (or 2 cloves of garlic you've already roasted)
  • 1/4 small red onion, diced (I used half, but it was a very tiny red onion)
  • Olive oil
  • 1/4 tsp cumin
  • Salt and pepper to taste
Directions:
Preheat oven to 450. On a rimmed baking sheet, stir together tomatoes, onion, garlic cloves (unless using already roasted), and cumin and a drizzle of olive oil. Place half eggplant on top of mixture, cut side covered with tinfoil and up. Roast until eggplant is very tender and tomato juices are thick, about 25-30 min. Let cool. Scrape out flesh of eggplant (discarding seeds if there are a lot) and roughly chop the flesh. Place in a bowl. Peel and cop garlic and add to the bowl. (If using pre-roasted garlic, add it now as well.) Stir in tomato and red mixture from baking sheet. Season with salt and pepper.

Uses:
This is great on toasted french bread or thin with some pasta water or wine and toss with pasta of your choice. Or just eat with pita chips. I didn't take any photos. My bad.

As I said, I love a new adventure. Here is another adventure I tried right after making these eggplant dishes. It was way more exciting. Way.

Skydiving adventure, thanks to the very able, always smiling, lovable JT.

So these are the adventurous things on my plate at the moment. Hope what is on your's is keeping life just as interesting and joyful. 


Monday, August 12, 2013

Potatoes & Green Beans in (Turkey) Bacon Balsamic Reduction

I confess: I love rich, complex-flavored sauces. I'm not ashamed to lick my plate when I'm done, or better yet sop the remainder up with some good, fresh-baked bread. Normally I'd find this a bit too heavy for summer, but we had thundershowers so I had an excuse to eat something hearty while curled up with a good book and the Norah Jones station on Pandora. You get the picture.


Dinner, book, wine, snuggly couch = perfect. You should look up the Latin on the paperweight.

Ingredients:

  • Potatoes cut into about 1 - 1.5 in. pieces. I used 10 very small Yukon Gold Potatoes that mostly had to be quartered. Fingerling or red potatoes would also be good. Maybe 2-3 cups? I should measure things before giving a recipe, huh?
  • Half an onion, roughly chopped (they like it rough)
  • Fresh green beans, ends trimmed and cut into 1 - 1.5 in. pieces - about 1.5 cups
  • Herbs - I used about 1 tbsp fresh chopped rosemary, 1/2 tbsp fresh thyme, and 1 tsp dried tarragon, plus salt and pepper to taste
  • 6 slices turkey bacon, cut into 1/4 in. pieces
  • 1/4 cup balsamic vinegar
  • Olive oil to coat pan, etc. (see notes below)
  • Splash of red wine from your "cooking glass"
  • 1 tbsp lemon juice
  • 1.5 tsp honey or dijon mustard
  • 1 tsp honey

Directions:
Heat oven to 425. Add potatoes, onion, and herbs to a 9X13 pan (or similar sized roasting or stoneware pan.) Drizzle lightly with olive oil and toss to coat. Roast for 20 minutes. Add green beans (salt and pepper to taste and tossed with olive oil) to pan and continue roasting another 10 minutes.

 Before oven
When adding green beans

Once green beans are added, start the sauce. In a medium-ish pan, coat bottom with olive oil over medium heat. Add diced bacon and cook, stirring frequently, until done. Put in a splash of of wine from your cooking glass to deglaze the pan, especially if you realize it needs to cool down quickly. If you don't have this glass, I don't understand how you cook. However, you could add any wine or broth or maybe water or lemon juice or more vinegar. Add vinegar, lemon juice, mustard, honey, and about a teaspoon more of olive oil. Stir to combine. Reduce to medium-low and simmer until reduced a bit - about 5 minutes or so. Pour over roasted vegetables and serve warm.

Plate-licking sauce


I don't want to hear it from you bacon purists about using the turkey bacon. You can make it with the real stuff and I'll envy you, but my arteries and girlish figure thank me. Vegetarians, I think a warm caramelized onion-balsamic reduction or perhaps with some kind of mushrooms would work well. I wanted the indulgence and the protein.

So in the moment that the summer storm rages, this is what is on my table. I hope you are just as comforted by what is on yours.


Sunday, August 4, 2013

Sweet and Spicy Shiro Plum Sauce

Sometimes we cook something and realize it has a personality that matches our own. Sweet and Spicy Shiro Plum Sauce was that way for me: sweet with a definite kick, messy, that something you can't quite put your finger on, and it gets along well with almost anything. And it is yellow and green - very Oregon.

I put this sauce on grilled chicken, dipped a spring role in it, poured some over chèvre and spread on crackers, and topped Haagen-Dazs vanilla bean gelato with it. I'm thinking of putting it on a cheese quesadilla and a peanut butter sandwich too. Seriously - this goes with everything.


This week's CSA Share. The pretty little yellow plums in the bowl are Shiros.

Ingredients:

  • 2 cups chopped Shiro plums (don't peel - there is good stuff in there!)
  • 1 jalapeño pepper - finely diced (I removed the seeds and most, but not all of the ribs. Do not touch your eyes for the next 24 hours.)
  • 1/3 cup sugar
  • 2 oz. white wine (I used King Estates Pinot Blanc)
  • Fresh thyme - leaves only (I think I used about 1/2 Tbsp - maybe a little more)
  • Zest of about 1/4 of a lemon - maybe a little less
  • Pinch of salt

Directions:
Combine all the ingredients in a pot over medium-high heat and bring to a boil. Stir until sugar is completely dissolved. Reduce to a low boil/simmer and continue cooking, stirring regularly, for about 20-30 min. until reduced by about a third. Skim any foam that forms. Pour into glass container to cool completely, then refrigerate. Serve on anything and everything. Serve hot or cold or room temperature. 


Sauce over vanilla bean gelato with a mint leaf garnish.

Trust me: in this moment jalapeños and thyme do go with ice cream. I hope you find something that is exactly you - whether it goes with everything or only one special thing or is a one-dish wonder. When you find it, enjoy the moment at your table.


Wednesday, July 31, 2013

Too hot to cook (not me, the weather): chicken salad

Last week I thought it was just too hot to cook most nights. So salads ruled the table. Fortunately I got the most lovely lettuce in my CSA share this week - and more cabbage too. (I pickled the cabbage with some onions thrown in too and added it to almost everything. Maybe I'll do a "Portlandia" inspired pickle it! blog post sometime.)

See - isn't it pretty? I think it looks like a rose.

I made a really nice chicken salad, made even more wonderful by the Red Flame Grapes in my share and the addition of cucumber from my parents' garden. 

Ingredients for about 4 servings:
  • 2 cups chopped chicken (I used some leftover rotisserie chicken. Tuna would work too.)
  • 3 oz. non-fat Greek yogurt (half a container)
  • 2 tsp. mayonaise (whatever kind you have)
  • 1/4 C finely diced onion
  • About 1/2 - 3/4 C grape halves
  • Herbs (I used about 1.5 Tbsp. fresh basil and 1.5 tsp. dried tarragon. I LOVE tarragon in chicken salad!)
  • Salt and pepper to taste
  • 4 cups salad greens with whatever veggies you want/have (I had shredded carrot and chopped cucumber in mine. I'm not going to tell you how to make green salad.)

Directions:
Gently mix everything except the last ingredient (salad greens). Divide greens among 4 plates - or just put what you want on your plate. Top with about 1/2 - 3/4 cup of the chicken mixture. If I'd had celery, I probably would have added diced celery to the chicken mixture. You could also add chopped nuts or sprinkle some on top. 


 Simple, delicious, and didn't heat up my kitchen.

So this was the cold plate on my table in the hot moments of mid-summer. Hope what is on your's is just as cool and satisfying. 

Wednesday, July 24, 2013

Patty Pan Squash - Cute & Versatile

Patty pan squash are so darn cute you'd think I would have taken a bunch of pictures of them. I didn't. Sometimes I just enjoy the moment and not try to capture it, alright? I'm sure you all know how to google search and find a picture to oh and ah over.

They are also versatile. I chopped one up to put in a mix of roasted veggies. I sliced one into rounds for  squash parmesan. I stuffed and grilled three others. You get the idea.

The patty pan squash parmesan was a favorite. It tasted decadent, but was secretly healthy. I have a deal not to tell my tastebuds.

Ingredients:

  • Patty pan squash (I used the biggest one I got for this - may have been 4" diameter at most.)
  • Olive oil - I still don't measure this
  • Tomato sauce (buy or make your own. I used tomato paste mixed with red wine until it had sauce consistency and added dried italian herbs, salt, garlic until it tasted good.)
  • Grated parmesan cheese - enough to lightly cover the surface of each slice. Amount will depend upon size of your squash.
  • Gremolata: 4 minced garlic cloves, 1/4 cup finely diced onion, olive oil/buter, 1/3 cup breadcrumbs or cornflake crumbs, 6-8 basil leaves torn or cut into small bits
  • More basil for garnish - because it is prettier that way

Directions:
Slice the squash about 1/4" thick. Brush with olive oil. Roast or grill at 400 for about 7-10 min. and then flip. Top with sauce and cook another 5 min. Top with parmesan cheese and cook until melted. 

Meanwhile, back at the ranch, prepare gremolata on the stovetop. Cook garlic and onion in oil and/or butter over medium heat until soft and golden. Mix in breadcrumbs, stirring frequently until toasted. Add basil and stir to combine. Remove from heat.

Top squash with gremolata and broil or keep on grill until lightly browned/crisp. (I didn't quite use it all - but put remainder on top of stuffed patty pans later.)  Top with basil chiffonade just before serving. See, I told you adding the basil just before serving made it look pretty.


Finished product. Somewhere between eggplant parmesan and a mini-pizza.

I swear to you that the cooked patty pan squash tastes like (and almost has the consistency of) butter. If you think you or your family doesn't like squash, you've probably made one of two mistakes:
  1. Used one of those giant, seedy, watery ones. (Smaller is better with squash.)
  2. Not given it the royal treatment it deserves: garlic, olive oil, fresh herbs.

Plenty of patty pan and other summer squash on my table at the moment. Counting the ways I love it. Hope you are too!

Monday, July 22, 2013

Fair to Share: Marionberry Rosemary Scones

There were Marionberries in my share this week! This was a fantastic surprise. Marionberries are indigenous to Oregon. They are a kind of blackberry, but are larger, sweeter, and juicier than other varieties. You can use other kinds of berries here, but if you can get ahold of some organic, Oregon Marionberries I suggest you grab them.

Since these were early season berries, I decided to bake with them. This scone recipe is perfect for sharing. I gave some to my parents, some to my friends Eric and Lisa at Eric's birthday party, and some to my friend Shannon just before we went to the Oregon Country Fair. (Which, like the Marionberry, is unique to Oregon.) Sharing food makes me happy!

This is a sign from OCF that I thought was apt.

Ingredients:
  • 2 cups flour
  • 3 Tbsp. brown sugar
  • 1.5 tsp. baking powder
  • 3/4 tsp. cinnamon
  • 1.5 Tbsp. chopped fresh rosemary
  • 1 stick (1/2 cup) butter, softened
  • 1 egg
  • 1/3 cup sour cream
  • 1 heaping cup marionberries
  • Optional: additional egg and cinnamon/sugar blend


Directions:
Pre-heat oven to 400. Sift dry ingredients together. Add rosemary. Add butter and mix in mixer or by hand until pea-sized crumbles appear. Add egg and sour cream; mix to combine and just bring together. (Add a bit more sour cream, or milk or water if needed to bring together.) Need lightly and bring dough into a ball. On a floured surface, press out in a circle about a 1/4" thick. Put berries on half and fold the dough over. Press edges to seal. (You could brush edges with beaten egg to help seal if you want.) Cut into pieces - whatever size or shape you want. I sort of did triangles and ended up with 13 pieces.) Place pieces on a baking sheet - line with parchment paper if you also hate clean up. If you want, you can brush with a beaten egg and sprinkle with cinnamon/sugar blend, as I did. You could also ice (flavored with lemon or almond would be nice) or leave plain. Bake for 10-12 minutes. Cool long enough that you don't burn your mouth on the berry filling - trust me. 


 Yummy even if they are different shapes.

It is important to sample before you share. 

You could also make this without the rosemary or with another herb. I think lavender would be yummy or lemon thyme. Let me know if you come up with something marvelous. 

With Eric's birthday and OCF, the weekend was also about silly fun. I attempted to get into the themes.

Princess Leia buns for Star War's themed birthday & OCF flower child braid w/honeysuckle from yard


Hope you are all enjoying - and sharing - what is on your table at the moment too!

Sunday, July 21, 2013

This is why I run: Bread and Wine (Grilled Veggie Panzanella Salad)


A Book of Verses underneath the Bough, 
A Jug of Wine, a Loaf of Bread--and Thou 
Beside me singing in the Wilderness-- 
Oh, Wilderness were Paradise enow! 
 
- Edward Fitzgerald's translation of Quatrain XII of Omar Khayyam's The Rubaiyat


Credit to Andi Graham for this photo taken at a local winery on a GNO.

Yes, I admit I run because I like to have bread and wine... and chocolate... and... you get the point. Or at least that is why I started running. (Ok, it is slow running AKA jogging.) Now I also run because I like to hear my breathing, smell the changing things in bloom, feel myself moving forward. It's also fascinating what goes through one's mind when it is allowed to wander. But I digress. You are here for the Panzanella. 

My second CSA share was filled with goodness. The mix called out for roasted veggies. I also had some leftover rosemary artisan bread. And it was too hot to turn on the oven, thus the grill. 

Salad Ingredients:

  • 3(ish) cups assorted vegetables, chopped into bite-sized pieces. I used: zucchini, yellow squash, fingerling potatoes, broccoli, onion, sugar snap peas (these added when other veggies were mostly done.) Use whatever you have. Since things like potatoes and carrots take longer to cook, either put them in first or parboil them first. 
  • Olive oil, which I rarely measure and don't plan to start
  • 1tbsp fresh rosemary cut up a bit (or other herb - thyme would be nice, too)
  • 4 slices french bread - or artisan bread or any bread you have around
  • 1.5(ish) cups salad greens (I had salanova lettuce, but any will do fine)
  • Optional protein: Dice leftover meat, nuts or beans
Dressing:

  • 1 minced garlic clove
  • 1/4 cup white wine vinegar
  • 1/3 cup olive oil
  • 1.5 tsp. dijon mustard
  • Salt and pepper as you like
Directions:
Toss veggies with olive oil and rosemary. Put in grill pan on the grill and cook at about 400 degrees until slightly charred, soft, and yummy. Time will really depend upon your grill and the veggies chosen. You can also roast them in an oven and it will probably take around 20-30 min. When about done, brush bread with olive oil and put on grill for about a minute on each side to toast and get the edges just a little charred. (Could be done under broiler if not grilling.) Remove all from grill and dice bread.

Put the salad greens in a serving bowl, top with grilled veggies. Top that with diced bread. Add protein if using. Drizzle with dressing and lightly toss. (Oh yeah, you should put all dressing ingredients in a container with a good lid and shake it like crazy.) You can top this with cheese and or fresh herbs (basil and oregano, perhaps) if you like. I thought it was rich enough without the cheese, but I'd never stand between someone and their desire to add cheese to anything.

Enjoying the meal al fresco with house Pinot Noir.

I understand that traditionally panzanella has tomatoes in it. If I'd had them I would have added to the grill pan, but they aren't quite in season yet in Oregon. I actually ate half of this and didn't dress the other half until the next day. I warmed it just a tiny bit to take the refrigerator chill off and the greens survived just fine.

This is what was on my table. Okay, so it wasn't in this moment, but I am thinking about it in this moment and I wanted to get a couple of recipes up to start the blog. Just one seemed lonely. Enjoy what is on your table.

First CSA Share: Asian Chicken Slaw

I've wanted to get a  CSA (Community Supported Agriculture) share for a long time. But I was never thinking about it at the right time or was lazy or busy or something. I've been working on having healthier habits and all that stuff we are supposed to do, blah blah blah. One day I just decided to go for it. I signed up and picked up my first share.

It was like Christmas in July. A weekly surprise present - just for me. Aww... you shouldn't have... wait, yes, you definitely should!

This is a picture of what was in that first lovely share.

Oh, the possibilities, the recipes dancing in my head. My mouth watered. I decided to make something that would use as may of the things I received as possible. Go big or go home. And so, Asian Chicken Slaw I made. You can easily make it vegetarian by leaving out the chicken. Add your favorite protein to make a complete meal.

Slaw:

  • 1/2 head Napa Cabbage (or other variety), finely sliced
  • 3 carrots, julienned
  • Big handful of sugar snap peas, sliced 1/2" pieces on diagonal
  • 1/2 apple (golden delicious or other sweet variety), cut into match sticks
  • Chopped or torn fresh purple basil, mint, and/or cilantro - about 1/3 - 1/2 cup total
  • 1 grilled chicken breast, diced (I seasoned with Asian Seasoning blend)
Dressing:

  • 2 Minced garlic cloves (I had big spring garlic cloves, so its an estimate since the cloves are still kind of forming.)
  • 1/4 cup rice wine vinegar
  • 1/4 cup soy sauce 
  • 1 Tbsp. lemon or lime juice
  • 1 tsp. ground ginger (use fresh if you want. I love fresh ginger, but like ground in dressings)
  • 1/3 cup olive oil
  • Salt and pepper as you wish
Directions:

Mix all the slaw ingredients together. Put all dressing ingredients in a small container with a good lid (a small canning jar, tupperware dressing mixer thing, repurposed jelly jar - all will work) and shake it until thoroughly combined. NOTE: It helps if you dance around your kitchen while you do this. It makes for happy, thoroughly blended dressings. Pour dressing over slaw and toss to coat.

This is a picture of tossing the dressing into the slaw.

It was good the next day, too. If you have somewhat different veggies on hand to add to the cabbage, just use those. Best if they are somewhat firm if you want to have leftovers that aren't soggy. If you don't have the fresh herbs to add, you can get by without them. If you just aren't an herby person, well I can only think I haven't fed you before. Because they are delicious.

That is what is on my table in this moment. Hope you enjoy what is on yours.